Showing posts with label Recipes. Show all posts

Sunday, August 19, 2012

Tofu Burgers

I need to be going to bed right now--but the seven hour marathon I just finished in the kitchen warrants, at the very least, a short blog entry. SO! Here it goes:

Dear Heidi,
Thank you for sharing your awesome blog, constantly giving me ideas and inspiration and--of course--delicious dishes.
--Rosalyn

Tonight, I cooked up a few things--but what I got to enjoy right away were my tofu burgers and homemade hamburger buns; oh, and french fries--made with my handy french-fry-cutter that my mom got me a little while ago.

The burgers? Easiest veggie burger I've attempted to make--and super satisfactory. The consistency was practically delightful to work with.
The buns? I think I've found myself a recipe, finally! Third times a charm, right? I was pretty close to giving up on finding a bun recipe that made me happy. I'm glad I kept on hunting. I followed the recipe pretty much exactly, which means they were made with only all-purpose flour; that's not generally my style, but I wanted to make sure the recipe turned out results that I wanted. Next time, I'm going to try and throw in a little whole wheat flour and see what happens.

Anyway--to bask in a bit of cook-therapy was great and my stomach was definitely happy with the results. More on this evening soon!

Saturday, March 3, 2012

Whole Wheat French Bread

As I type, my bread is baking. This is my second attempt at making french bread, and I think it's going to be far more successful than my last try--and because I'm feeling so confident, I've got this list of things I now want to make from scratch today.
There are a couple reasons why I think this recipe worked better than the last; first, because I broke down and bought some all purpose white flour (unbleached! Because, it makes me feel better that it's not whole wheat...) Also, I used yeast from a jar; I'm suspicious that the yeast I used out of a packet last time wasn't a fresh as the yeast I used today.
Anyway, my loaf is huge! And I love it. I hope it tastes as great as it looks. Here's the recipe. 


Adapted from Famous French Dessert's recipe.
Ingredients:
2 cups Whole Wheat Flour
3 cups All Purpose White Flour
1 Egg
1 tbsp. Sugar
2 tsp. Salt
1 tbsp. Dry Active Yeast


Directions:
1. Sift the two flours together into a large bowl (I would mix 2 cups whole wheat flour and 2 1/2 cups all purpose flour, adding the extra 1/2 as needed). Mix in salt and sugar. Move the ingredients to the sides of the bowl, creating a large "well" (an empty space) in the middle.
2. Pour the yeast into the "well" and pour 2 cups of lukewarm water over the yeast. Sprinkle about 1 tbsp. of flour over top. Wait (about 10 minutes) for bubbles to appear in the yeast.
3. Once the bubbles have appeared, you can start to mix together the ingredients (hands work best) to form the dough. The best way to do this, is to gradually incorporate the flour that is "waiting" on the sides of the bowl. Doing it all at once will be too difficult. So, go bit by bit, if it's too liquid, just add a bit more flour at the end. You should finish this "pre-kneading" stage with a round, firm ball of dough. Again, if it's too sticky, add a little more flour.
4. Kneading: remove the bread from the bowl and place on a lightly floured surface. Knead it by pushing your palms into and then turning it one quarter. Keep kneading and doing quarter turns for about 5-10 minutes, or until the bread is supple and non-sticky.
5. Place the bread in a lightly floured bowl and cover with a damp dish cloth. Let it rise for about 2 hours (depends on the room temperature, you want it to be fairly warm). It should double in size.
6. Preheat oven to 400°F. Re-sprinkle a counter top (or other surface) with flour. Prepare a baking pan by lightly oiling and flouring it (or bake on top of parchment paper). With your hands, remove bread and place on floured surface. Knead and then flatten into a circle; fold over the edge, pressing the rim into the remaining dough; repeat, until you have a log and then pinch the flap with the bottom so that the dough is one piece. Roll back and forth the create a long loaf. Put the loaf on the pan. Cover with a dish towel and let rise for 30 more minutes. Using a sharp knife, cut diagonal lines across the top of the bread. Whisk the egg, and using a brush (or a teaspoon) coat the top of the bread. Put in oven and bake for 30 minutes (more or less, depending on how much you like it browned).

So, I tried a piece...yeah, I'm definitely going to have to toot my own horn on this one.
More on today's cooking adventures coming soon!


Friday, March 2, 2012

Spicy Tofu Stir-fry

It makes me happy when I'm craving something and I just so happen to have the ingredients to throw it together and satisfy my taste buds. Tonight--I wanted stir-fry. When the craving hit, I immediately mentally sorted through the contents of my fridge. Tofu, red bell pepper, onions, garlic; I knew my pantry housed some rice and some soy sauce and figured that those things tossed together would be sufficient for my recipe.

Then I thought of my roommate and fellow blogger (Follow her blog, A Fine Gourmance!). We had already made plans to stay in for the evening so inviting her to enjoy some of my stir-fry seemed like the appropriate thing to do. She was all for the idea and offered to supply the recipe with asparagus, sriracha, and stir-fry sauce. As soon as I got home from work, we got to cooking. Our collaboration in the kitchen resulted in the best possible outcome for the stir-fry I had been dreaming about all afternoon! It was delicious.

What I'm most proud of is how the tofu turned out. This was my first time cooking tofu for the sake of having tofu. All the other times that I've used it, I've hidden it--in cheesecake, in lasagna--it always ended up mushed in with other ingredients so you didn't even know it was there. Tonight, I wanted it to shine. I was surprised by how well it held up through the whole cooking process; and I'm happy to report that my first attempt at cooking tofu was a success. My roommate said, "I'm just so surprised by how delicious this tofu is; it's perfectly juicy, it's not dried out--it doesn't taste like rubber, which I've experienced before." That my friends is a high praise from a non-vegetarian.
Anyway, enough about me, here's the recipe!

Spicy Tofu Stir-fry

Ingredients:
1 package of firm tofu
1/2 of an onion
1/2 of a red bell pepper
1 1/2 cups of chopped asparagus
1 carrot
3 cloves of garlic
2 tablespoons Worchestire sauce
1 tablespoon Soy sauce
dash of ground mustard
dash of thyme
dash of black pepper
dash of crushed red pepper flakes
dash of basil
2 tablespoons stir-fry sauce
Olive oil (for frying)
Sriracha (to taste)
1 cup of rice

Directions:
1. Drain the tofu of as much water as possible; marinate in the Worchestire sauce and a bit of sriracha--set aside while you cut onion, bell pepper, asparagus, carrot, and garlic. Set vegetables aside.
2. Start cooking your rice. (We used white rice, because my roommate has a ton she's trying to get rid of, but I'm sure it would be great over brown rice or--oh!--quinoa.)
3. Slice the tofu into strips for frying, fry in the olive oil until both sides are browned; set aside. (If you would like to have smaller chunks in your stir-fry, you can either cut them smaller before frying or after frying. I waited until after so that it would be easier to flip them their first time in the pan.)
4. Pour the soy sauce over the vegetables and then add the spices; mix well.
5. When the rice is just about done, sauté the vegetables and the tofu; add the stir-fry sauce. Cover the mixture for a few minutes in order to let the vegetables get soft.
6. When the carrots have softened to your liking, you're done! Spoon the vegetables over the rice, add a bit of sriracha for a little spice, and enjoy.

That's all for now!
Maybe tomorrow I'll blog about my french bread and cracker making adventures--we'll see...
Have a good night :)

Thursday, March 1, 2012

Portobello Steak.

The other night I decided that we needed a little luxury to go with dinner. When I think of meat eaters eating steak, I think expensive, marinated, something the cook is proud of because they spend a lot of time on their own special recipe. Honestly, I never liked steak when I was a meat eater. I must have never had it cooked just right, or flavored to perfection. It was tough and I would have rather eaten just about any other slab of meat. Those days are long behind me, thankfully, but the idea behind a good steak is still there. The traditional meat and potatoes meal still beckons to me sometimes. This is why I am so thankful God gave me mushrooms (and sometimes, I am pretty sure he created them with me in mind).


To cook the perfect portobello steak you will need:

Whole portobello mushrooms
Vegetable broth
Yellow onion
Salt
Pepper

I happened to have on hand a special blend of spices from The Savory Spice shop in Colorado Springs called Cantanzaro herbs which is made up of garlic, lemon peel, marjoram, basil, mediterranean thyme, rosemary, and oregano. All of these spices would be good alone or paired.

Start by sautéing the onions in the broth. When the onions are translucent and melt in your mouth juicy, add the portobellos and a little more broth if it has evaporated from the pan to prevent sticking. Cover the pan with a lid and let the whole thing simmer for about five minutes. Flip over the mushrooms and cook for another five minutes.

Plate the hot mushrooms and spoon a little of the broth and onions over the top. Serve the beautiful steak with baby potatoes and asparagus, steamed greens, or your veg of choice.

I am pretty sure this was one of my husbands favorite dinners I have made yet. I am pretty pleased.

Enjoy!
Megan

Wednesday, February 29, 2012

Hello Joe.

Tonight for dinner, I made the tastiest, most wonderfully sloppy, sloppy joe. *Swoon*

He was handsome, spicy, flavorful and filling. He kept me wondering what the next bite would bring, and had me begging for more.

Maybe that's a little dramatic, but tonight I learned that I make one heck of a good vegan sloppy joe. My joe consists of tempeh, mushrooms, onions, ketchup, mustard, brown sugar, garlic powder, red pepper flakes, salt and pepper all piled onto a whole wheat bun.


Really, this is as close as I can get without settling for something like fake meat crumbles (which I have sort of grown to despise).  If you have an appetite for sloppy joes, please give this recipe a whirl and let me know how it turns out!

I'm off to have seconds!
-Megan

Friday, January 27, 2012

Vegan Apple Sauce Pancake with Berries

If you are looking for an easy (and beautiful!) breakfast, this is it. 

This pancake is made up of 1 cup whole wheat flower, 3/4 cup vanilla soy milk, 1 tbsp baking powder, and of course 1/4 cup applesauce. Spread on some Earth Balance and top with your favorite berries! Yum! 


Pretty food is always better!
-Megan

Saturday, January 21, 2012

French Onion Soup in a Whole Wheat Bread Bowl!

A few months ago, a friend and I decided that we wanted to see the movie One Day. But, knowing it was based off of a book, we agreed to read the book first. Somewhere along the line, we decided on one winter's night we'd need to get together for dinner and watch the movie with a meal--soup in a bread bowl. Don't ask me why, but soup in a bread bowl just seemed the perfect choice of meal to pair with a movie based off of a book.

We made this plan before I became a vegetarian; before I started making just about everything from scratch. Tonight, we finally got around to seeing this long awaited movie--and I had an excuse to make and consume an entire bowl of bread. The movie was barely okay, but the meal was pretty awesome.

I found the recipes here; and while I think I'd use less onion next time--I enjoyed it all the same. There is something about homemade food that tastes so much better than anything you can get when you're out somewhere. I would definitely give these recipes a try the next time you're craving comfort food on a cold winter evening!

I made croutons out of the bread bowl filling so I can sprinkle them over the top of my leftover soup tomorrow. And now, I'm officially taking a break from the kitchen--at least until tomorrow!

Rosalyn

Cinnamon Applesauce

Three words: De-Lic-Ious.

Homemade Cinnamon Applesauce:

Ingredients:

7 apples (I used 4 Gala and 3 Golden Delicious, because I like sweet apples!)
1 cup water
1/4 cup brown sugar
1 teaspoon cinnamon
1/2 teaspoon nutmeg

Directions:

1. Cut and peel your apples of choice.
2. Combine apples with the rest of the ingredients in a pot, and cook over medium heat until the apples are soft; about 20 minutes.
3. Mash! I put mine in a blender, because I don't like chunky applesauce--but you could use a potato masher, too.
4. Enjoy! I tried it when it was warm--it smelled so good I couldn't wait. It was delicious. I'm sure it'll be just as tasty cold, too.

I'm on a roll today. Stay tuned! French onion soup in a made-from-scratch bread bowl, coming soon!
Rosalyn

Homemade Frozen Yogurt

In just a couple of days, I'm getting my wisdom teeth taken out. Most of my friends have horror stories associated with their experience of the extraction of their third molars--but I'm hoping I won't have any to report. And while I'm hoping and praying that everything goes smoothly, I'm well aware that my eating habits are going to have to be tweaked, just a little bit, while my mouth heals.

My friend, and author of Just Nourishment, has been looking forward to my surgery--not for any malicious reason having to do with the pain, or anything, but because she's gone through the experience and has volunteered to be my caretaker the day of. Her favorite part about getting her teeth removed was all the frozen yogurt she got to consume while she was healing; getting to hang out with me as I recover has given her the excuse to indulge a little more!

Now, you know me. I'm a very intentional eater. (I actually realized the other day that I'm kind of a food snob; I never meant to become that way--but now that I make pretty much everything I eat with my own hands, I'm reluctant to eat a lot of things...anyway!) While I know that most people eat lots of mashed potatoes and frozen yogurt and--well, that's all--for the first few days after surgery, I can't do that. I require a well-rounded diet, to satisfy me both mentally and physically. So, over the next couple of weeks, I plan on trying a few new soup recipes, I'm going to make applesauce for the first time, I'm pretty stocked up on ingredients to make smoothies, and I'm good on soft fruit--like bananas and pears. Of course, I will be sharing with you my cooking experiences as I try out new recipes that hopefully yield some delicious light meals. But for now, I'd like to tell you about the frozen yogurt I just made.

It should come as no surprise that I've opted to make my own frozen yogurt instead of going to the store and picking up a carton or two. Homemade frozen yogurt is doable--so I couldn't help myself. For the past couple of days I've been doing a little research. I found a couple of recipes, read a couple blogs, went to the grocery store, bought some ingredients--and this morning, I just winged it. There were a couple things I had mentally jotted down as I started throwing things into my blender. I remember I read somewhere that the yogurt mixture should be sweeter than you'd usually like, because when it's frozen it'll be less sweet; I remember reading someplace else that I had to make sure I had good chocolate if I planned on making chocolate frozen yogurt; and I remembered that--since I don't have an ice cream maker--that I was going to have to be patient and persistent for a few hours, in order for me to end up with my desired sweet treat.

I made two different kinds. And, while they are in the process of freezing and I haven't had the chance to try the finished product, the mixes tasted pretty good. I'm hoping they are just as delicious when they're frozen. Here are my recipes:

Homemade Vanilla Frozen Yogurt:

32 oz plain, low-fat, Greek yogurt
5 tablespoons agave nectar (which probably equals an easier measurement, like a forth of a cup, but I was winging it, remember? So I just kept adding until it was as sweet as I liked. You can do the same!)
3 teaspoons vanilla extract

Mix all the ingredients together (I used my blender, but I'm sure you could just do it in a bowl). Then, stick it in the freezer.

Like I mentioned before, I don't have an ice cream maker. So, for the next couple hours, I have to keep an eye on my dessert; every hour I will take it out, scrape the frozen mixture from the sides with a fork, and then stir it vigorously. I think in 2-3 hours it'll be set. If you do have an ice cream maker, I'm guessing you can just put the mixture in there and you'll have yourself some frozen yogurt in no time.

Homemade Chocolate Peanut Butter Frozen Yogurt:
(because I'm a sucker for chocolate/peanut butter ice cream...)

32 oz vanilla, non-fat, Greek yogurt
1 bag of good semi-sweet chocolate chips
2 tablespoons agave nectar
5 tablespoons peanut butter (I use the creamy Earth Balance brand)

Melt 1 1/2 cups of chocolate chips; take the melted chocolate and mix it with the remaining ingredients. (Again, I used a blender--and for this one, it'd probably be easier than mixing by hand.) Take the left over chocolate chips and mix it with the yogurt mixture, then freeze!

Now, I did a little math and got a calorie count for you. For the vanilla frozen yogurt, if you break it down into about 8 servings, it's about 130 calories. For the chocolate peanut butter, if you break it down into about 10 servings (because it yields more), it's about 290 calories. Not bad, eh?

Well, I'm off to go stir my freezing yogurt. I'll be back to let you know how it turns out!

Update: So, the chocolate peanut butter frozen yogurt turned out to be oh-my-goodness tasty! The vanilla turned out...well, like vanilla; next to the chocolate peanut butter, it didn't compare--so I tossed in a cup of milk chocolate chips to give it the necessary chocolate kick. And then I thought, Well...I could have done the healthy thing and thrown in some fruit, instead. That's when it hit me--You still can! So, I took a cup of frozen raspberries, tossed them in the microwave for a couple minutes, mashed them up really well, added a little agave nectar, and mixed it into the frozen yogurt. BAM! Raspberry, vanilla frozen yogurt with chocolate chips, for the win! 

 Rosalyn

Wednesday, January 4, 2012

Dinner for two

I had an old friend over for dinner the other night. We haven't seen each other in a while--a while dating back to before I started making just about everything from scratch and before I became a vegetarian. It was her idea that we get together for dinner so she could try one of my dishes. The only problem was, my mind has been in leftover mode for the past four weeks--which has been incredible for my pocketbook, but not so great for my imagination. It was time to break out the recipe book I've been keeping. I wanted to make something good, something simple, and something new. My stepmom had given me a recipe a while back for Pilaf Stuffed Acorn Squash. It looked good, so I thought I'd give it a try. But, having never had an acorn squash before, I decided to use butternut squash, instead. It ended up being pretty, simple, delicious, and oh-so-filling! Next time I plan on trying it with acorn squash, now that I know what it looks like...I'll let you know which way is better--although I'm sure both ways are worth a try.

Here's the recipe:


Stuffed Butternut Squash
Ingredients:
1 butternut squash, halved
1/2 cup water
3/4 cup uncooked wild rice
1 tablespoon olive oil
1/4 c golden raisins
2 tablespoons chopped pecans

Salt (to taste)
2 oz shredded cheese (I used gouda


Directions:
Heat oven to 400.

Place squash halves cut side down in ungreased shallow baking dish, adding 1/2 cup of water; bake at 400 for 40 to 50 minutes, or until tender.
Meanwhile in medium saucepan, cook the wild rice, adding a tablespoon of olive oil. When it's tender, remove from heat and add raisins and pecans. (I'm going to be honest. I used a rice cooker--I have never made rice without one before and, therefore, have no idea how to make it in a sauce pan--either way you feel comfortable cooking the rice, great! Just as long as it's cooked.) Salt to taste. 
Turn squash cut side up in baking dish. Empty the shell of the squash, leaving just enough for it to keep its shape. Mix the squash with the rice mixture and then spoon it back into the shells; sprinkle with cheese. 

Bake at 400 until cheese is melted and rice mixture is hot.


There you have it. Dinner for two. And it cost less than $10!
That's all for now,
Rosalyn

Friday, December 30, 2011

Sweet Potato Cheesecake

Ten minutes ago, if you would have stumbled upon me in my kitchen, you would have caught me in the middle of a victory dance.

It's official, I'll probably never make pumpkin anything ever again--unless I end up marrying someone or having children who are allergic to sweet potatoes. Hopefully that doesn't happen. But, since I'm nowhere near marriage--and even farther away from having children--I'm allowed to jump head first into this love affair I've got going with sweet potatoes!

As I type, my sweet potato cheesecake is baking. Why the victory dance before I've even had the chance to try the finished product? Because! It took a great deal of will power to stop myself from licking my blender clean of the cheesecake goodness that now bakes. Plus, I can imagine how delicious the finished product will be--with cinnamon and sugar coated walnuts sprinkled on top! I can hardly wait.

But, I will...until tomorrow night, when I ring in the new year with my fellow scratch kitchen chef--Megan.

However, just because I have to wait to eat the cheesecake does not mean I can't gush about it here, now.

Of course, I made the whole thing from scratch--right down to the graham crackers that were crumbled into the graham cracker crust. I'm not too sure I'm in love with the graham crackers on their own, so I'm going to keep searching for various recipes until I find one I'm satisfied with. Nevertheless, I thought they turned out well enough for the purpose intended.

Making the actual cheesecake was a breeze! Using the pureed sweet potatoes I had left over from last night's sweet potato cookies helped, as far as time goes; then, of course, things go pretty quickly when you just throw everything in the blender. I'm hoping it tastes as good as the raw version led me to believe.

Anyway--enough talk. Here's the recipe!

Sweet Potato Cheesecake (With a secret ingredient!)


Ingredients:
1 12-14 oz package of silken tofu (don't tell them it's there and they'll never know!)
1 8 oz package of reduced fat cream cheese
1 cup pureed sweet potatoes (if you have extra, feel free to use it!)
1 cup organic sugar
3 tablespoons unbleached all-purpose flour
1/2 teaspoon ground ginger
1/2 teaspoon ground nutmeg
1 teaspoon ground cinnamon
1/4 teaspoon baking soda
Dash of salt
Graham cracker pie crust 


Directions:
Preheat oven to 350 F.
(If you are making your graham cracker crust from scratch, put it together here and pre-bake it according to the directions.)
Combine all the ingredients for the cheesecake in a blender and blend until it is smooth and creamy.
Pour the mixture over the graham cracker crust and bake for 45-50 minutes.
Allow the cheesecake to cool, slightly, before putting it into the refrigerator. 
When it's completely set and cold, it's ready to serve!


I'm going to add nuts to mine; so, if you'd like, you could sprinkle some sweetened (or maybe not sweetened, depending on your taste) nuts over the top. I'm using walnuts, because they were cheaper than pecans--but I'm sure you could use whatever nut you wanted!


I'll be back to let you know how it tastes.


Update: It was a winner!


Happy New Years!
Rosalyn

Thursday, December 29, 2011

Sweet Potato Cookies

Tonight, I am King of the Lab--or, rather, Queen of the Kitchen.

Today, while I was at work, I was struck with this sudden, undeniable urge to bake. It happens to me every once and a while and the feeling will linger until I've satisfied my craving. When the mood struck, my mind immediately began going through my contact list of mouths I've got stored away for occasions such as these; because, you see, I dare not bake for myself alone. I'd rather put my hands to work, allow my taste buds the satisfaction of a sample, and give the rest away. Once I decided who would be gifted with the fruits--or, rather, sweet treats of my labor, I had to decide what to make.

What I really wanted to try was a batch of cinnamon rolls. I've never made them from scratch before and I've got this recipe that I've been anxious to try for weeks! But--I couldn't think of enough mouths to dole them out to, and such decadent sweets aren't allowed in my diet, just yet. So, plan B.

The winter months and holiday seasons have left me with a variety of pumpkin recipes to choose from. While the former me would have jumped at the chance to make something sweet with that versatile plant we call a pumpkin, the new me has been feeling hesitant about it. Why? Because the easiest way to add pumpkin to a recipe is to buy it in a can--something I've been trying to avoid when at all possible. And, yes, I could buy a pumpkin and go through all the steps to make my own version of what comes in a can--but then I think back to my Halloween days as a kid and all the work it took to hollow out a pumpkin, and my desire to eat it withers away.

But, lately, I've been thinking...

Every year, my grandma makes sweet potato pie instead of pumpkin pie for Thanksgiving and Christmas. I wondered--if you could essentially substitute sweet potatoes for pumpkins in a pie, why couldn't you do that in everything else? From pancakes to cookies--the possibilities seemed endless. I needed to give it a try. So tonight, I set out to make sweet potato cookies.

Ladies and gentlemen--Queen of the Kitchen. This is the best experimental recipe I've made thus far and I encourage you to try it! Switch things up a bit, I dare you.

Sweet Potato Cookies


Ingredients:
1 1/2 cups unbleached all-purpose flour
1 cup whole wheat flour
1 teaspoon baking soda
1 teaspoon baking powder
1 teaspoon ground cinnamon
1/2 teaspoon ground nutmeg
1/2 teaspoon sea salt
1 cup organic sugar
1/2 cup softened butter (I used vegan butter) 
1 cup  pureed sweet potato (If your sweet potato yields a little more than a cup, that's okay! Use the extra.)
1 large egg
1 teaspoon vanilla extract


Directions:
Sweet Potatoes: boil your sweet potato(es) until they are soft enough to stick a fork through and then drain; while they are still hot, beat them until they are mashed or toss them into your food processor. Set the mashed potatoes aside.
Preheat oven to 350
Combine flour, baking soda, baking powder, cinnamon, nutmeg and salt in a medium bowl. Beat sugar and butter in a large mixer bowl until well blended. Beat in sweet potatoes, egg, and vanilla extract until smooth. Gradually beat in flour mixture. Drop round tablespoons onto parchment paper covered baking sheets.
Bake for 15-18 minutes, or until edges are firm. Cool on baking sheet for 2 minutes; remove to wire racks to cool completely.


I really do hope you'll give this recipe a try--they're plump, soft, and delicious!
Happy baking,
Rosalyn

Sunday, December 11, 2011

Whole Wheat Chocolate Chip Cookies

It snowed last weekend.

For some reason, this year I have a new appreciation for the snow. While I hate to drive in it in my little car, I've found that I enjoy the beauty of it. There is nothing better than being wrapped up in a blanket and cuddled up with a book as I watch the snow fall--at least, not during winter.

Unfortunately, I had to work last Saturday. Having to get up and get dressed in order to be presentable makes it a little harder to enjoy the snow. But, going to work actually turned out to be pretty great. Why? Because while I was there, someone put the idea in my head that a snowy Saturday afternoon would be the perfect time to bake cookies! Once the idea was in my head, I immediately began searching the internet for whole wheat cookie recipes. I found this one (check it out!) and decided it was a chocolate chip kind of day.

I tweaked the recipe, just a little, but they turned out deliciously! They also didn't spread, like the recipe picture shows, and I couldn't figure out if that was because I'm cooking at a high altitude or because I didn't use white whole wheat flour or what--but the cookie bites they ended up being got rave reviews. (I had 2 cookies and then promptly gave the rest away; cookies are great snowy-day gifts and I like sharing them way more than I like eating them all!) Every bite ended up being filled with chocolate--which I think is definitely a plus. I'll be making these again, for sure.

Whole Wheat Chocolate Chip Cookies
Ingredients:
6 tablespoons vegan butter
1/2 cup granulated sugar
1/2 cup brown sugar, lightly packed
3 tablespoons honey
1 tablespoon vanilla extract
3/4 teaspoon salt
1 tablespoon cider vinegar
1 large egg
1/2 teaspoon baking soda
1/2 teaspoon baking powder
2 cups whole wheat flour
1 (12oz) bag of semi-sweet chocolate chips 
1 cup ground almonds (optional)
Preheat the oven to 350 F. Lightly grease a cookie sheet, or line your cookie sheet with parchment paper.


Directions:
In a large bowl, beat together the butter, sugars, honey, vanilla, and salt until smooth. Beat in the vinegar, egg, baking soda, and baking powder. Stir in the flour, then the chocolate chips and almonds, mixing JUST till combined. Drop the dough, by tablespoonfuls, onto the prepared baking sheets. (I'm not generally a dough dropper; I always roll my cookies into little balls so they come out nice and round. While this was a bit tricky, with all those chocolate chips!, it also enabled me to make sure there weren't a ton of chocolate chips left in the bowl.)

Bake the cookies for 10 to 11 minutes, until they’re starting to brown around the edges. Remove them from the oven, and allow them to cool for 5 minutes before transferring them to a rack to cool completely.


Make this a cookie baking weekend!


Happy baking!
Rosalyn

Monday, December 5, 2011

Pumpkin-Apple Chips

At this point in the season, pumpkin spice has completely replaced cinnamon in my diet (sorry cinnamon).

I saw this (click!) on pinterest (follow me!), and had a small burst of excitement that went something like this:

"Ohhh I LOVE apple chips..."
"I HAVE APPLES"
"And two hours to kill"
             And...
"OMG These would be amazing with pumpkin spice instead of cinnamon!"

So... I spent the last two hours enjoying the smell of simmering apple slices. They taste even better than they smell.

They are crispy on the outside with little bursting pockets of juice that happened to survive the hour in the oven.

They are perfect, and... almost gone.


Hope your Monday was delicious, 
Megan

Sunday, December 4, 2011

Whole Wheat Ciabatta Bread

Turns out, I can cook--and I'm pretty excited about it.

Here's the story--

While on my hunt for any vegetarian recipe that I can get my hands on, I've come across a number of panini recipes. I'm all for a good panini, however, a panini maker is a bit out of my price range; instead of rushing to the store to get the necessary appliance to make the delicious sandwiches I keep finding, I made a mental note to get a George Forman, one of these days. My rational behind that alternative was that a George Forman could make paninis and a plethora of other things.
But--this was all a plan for one day.
In the future.
When I had a handful of cash I could donate to the panini cause.

Well, I mentioned this plan, off hand, to my mom and stepdad when I talked to them on Thanksgiving. I didn't think anything of it--I've been filling my mom in on pretty much all of my food endeavors, and this was just one more.


Turns out, they were paying very close attention to what I was saying.

This past Friday I'm at work, going about my day as usual, when I get a text from my roommate. She has informed me, with lots of exclamation points, that I have received a George Forman in the mail. My reply? "Shut up!!" When she assures me that she is not kidding, I rush away from my workstation and immediately dial my mother.

"Did you get me a George Forman?" I ask.
"Yes," she answers. "Well, technically V bought you one."
--insert lots of squealing and thank-you's here--
"Merry Christmas," she says.
"Wait, I thought we weren't doing gifts?"
"That's what I said! But when we were on the phone with you, he bought it. That's why he asked for your address. And when he hit submit, I told him I thought we weren't doing gifts. He said, 'It's not a Christmas gift. She said she needed it."
"Oh, I'm so excited!"
"You need to thank him; he's at home so you should be able to get a hold of him there."
"Okay, I will."

And I did--there was more squealing and thank you's, of course--and the rest of my day I was floating on a cloud. When I got home, there was jumping and squealing because by george, my George is beautiful.

The problem? You can't make a panini if you don't have any bread. And--you know me--I'm not just going to go to the store and buy bread, I needed to make it. So, before I went to bed, I found myself searching the internet for a ciabatta bread recipe. Ciabatta bread has been rumored to be the best bread for a panini. Well, I found one--and this is where I got creative.

I'm a whole wheat kind of girl, now. The recipe I found called for only all-purpose flour, so I took it upon myself to alter the recipe. Before I tucked myself in, I made the starter. The next afternoon, I began the process of making the bread. Things didn't go exactly how they should have gone, which made me nervous about how it would turn out, but it actually turned out pretty delicious. My roommate and I had paninis for dinner--and I'm thinking that'll happen more than a few times in our future. I put cream cheese, sauteed squash and red bell pepper with avocado on mine--one word: yum.

Anyway, here is my adapted recipe for Ciabatta bread! It's great for sandwiches and would probably be delicious sliced and dipped in some sort of dip or sauce--the possibilities are endless.


Whole Wheat Ciabatta Bread:

INGREDIENTS:
Overnight starter:
1 cup all purpose flour
½ cup whole wheat flour
1 cup cool water
1/16 teaspoon instant yeast

Dough:
all of the starter (from above)
1 teaspoon instant yeast
¾ cup whole wheat flour
¾ cup all purpose flour
1 1/4 teaspoons salt
1 teaspoon sugar
¼ cup milk
2 tablespoons olive oil

DIRECTIONS:
For the starter:
1. Mix the starter ingredients in a small bowl until well combined. Cover the starter and let it rest at room temperature overnight, or for up to 15 hours. It will become slightly bubbly and puffy.

For the bread:
1. Place all of the dough ingredients, including the starter, into a large mixing bowl; stir until all the ingredients form a hunk of dough (about 5-7 minutes. It’s a great workout and well worth the effort.) After mixing, the dough will be smooth and soft.
2. Using greased or lightly oiled hands, transfer the dough to a greased bowl, cover it, and let it rise for 2 hours.
3. Lightly grease your work surface/counter, and a half-sheet baking pan or similar large baking sheet or line it with parchment. Grease your hands, as well.
4. Very gently turn the dough out of the bowl onto your work surface; you don’t want to deflate it. It’ll lose a bit of volume, but don’t actively punch it down. Using a bowl scraper, bench knife, or your fingers, divide the dough in half. You should have two fat logs, each about 10″ long x 4″ wide.
5. Handling the dough gently, transfer each piece to the baking sheet, laying them down crosswise on the sheet. Lightly cover the dough with heavily oiled plastic wrap or a proof cover, and allow it to rise for 60 to 90 minutes.
6. Midway through, gently but firmly dimple the dough with your fingers, making fairly deep pockets. Towards the end of the rising time, preheat the oven to 425°F.
7. Spritz the risen loaves with lukewarm water. You’ll see that the dimples have filled in somewhat, but haven’t entirely disappeared. Bake the loaves until they are golden brown, about 18 to 20 minutes. Remove them from the oven, and cool on a rack.

That's all for me tonight--Rosalyn

Pumpkin-Oatmeal-Chocolate chip-Cookies

Every so often a recipe will really jump out at me. Sometimes, I read a recipe and have to immediately go to the grocery store for the ingredients that I am missing and get right to cooking. Tonight, this exact scenario happened, only I had all of the necessary items to start baking right away...which is how I came to have way too many (freaking amazing and delicious) cookies. 

Tonight I made cookies from a recipe on a friend's blog. Kailin is the blogger at Just Nourishment and she is amazing at what she does. She has a degree in nutrition and dietetics and cares a lot about helping people eat healthy. Check out her blog and please, make this recipe! I mean, who puts pumpkin in oatmeal cookies?! It so genius! You will not regret reading her blog or using her recipes.


Love and cookies, 
Megan


PS: I dunked mine in ice cold vanilla soy milk....OMG. 

Quick & Easy Veggie Soup

We are to that point in the month where we are waiting on payday to go buy groceries and we are trying to eat up what we have left over from the past few days meals. What I had lying around was: a few celery stalks, half a bag of baby carrots, half a cucumber, half a package of udon noodles (I know, not from scratch!) and some vegetable stock.

I have started a pretty rigorous work out regiment and after a hard workout all I can think about are veggies!

So... I threw what I had together and made a crunchy, slurpy, hearty, spicy soup that filled me up and made me feel great too.


This is by far the easiest recipe I have ever made. 


1. Chop the veggies you have on hand. Like I mentioned before, I had carrots, celery and cucumber. I roughly sliced and chopped my celery and cucumber and tossed the carrots into my food processor for a few pulses.

2. Boil your pasta. When its nice and tender, drain it and place heaping spoonfuls into serving bowls.

3. While your pasta is boiling heat your vegetable stock. Set it aside.

4. Add your chopped veggies to your bowls of noodles and then pour the steaming hot broth over it. Fill it to your preference. I personally prefer less broth.

5. Garnish with a sprinkle of parsley and a little red pepper (if you need some spice... I do!)

6. Eat it and enjoy how healthy you are! Yay!


Happy Sunday!
Megan


Homemade Enchiladas

What's better than making your own whole wheat flour tortillas?

Making your own whole wheat flour tortillas while listening to Christmas music and dancing like no one is watching.


The other night, I had a friend over for dinner. This was the first time since I started this cooking-from-scratch adventure that I was brave enough to share a meal with someone just as it was coming out of the oven. (Someone who isn't Megan; someone who may or may not have put on a brave face and eaten what I made, even if it wasn't good.)  I have been enjoying my food--but while I've been taking pleasure in the experience of eating something that I've made entirely on my own, it's not always enough. I like to make things for other people--so, I was excited to have a friend over to cook for.

My guest--R--is a very picky eater. We joke all the time about how different we are; honestly, I've never had a friend who has come so close to being my complete opposite--a truth that extends to our eating habits. He's not a big fan of vegetables; needless to say, trying to decide on something that I could make that we'd both enjoy was a bit of a challenge. But--I'm always up for a challenge. Furthermore, I believe in compromises. So--enchiladas was the dish we decided upon. I found a recipe for vegetarian enchiladas that I had been wanting to try and I had everything I needed to put them together. Also, my grandma had given me a recipe for enchilada sauce a couple weeks ago--so it was perfect; I was going to get to try two different recipes in one meal. And, I was looking forward to making tortillas again--I made them a few weeks ago and, while they turned out decent, I wanted to play with the recipe in order to make them less dense.

So, on Wednesday night, I found myself dancing around the kitchen to Christmas music while I made my whole wheat flour tortillas and cooked up some enchilada sauce. (I figured it'd be good to have the tortillas already made for Friday and I was hoping that making the enchilada sauce a couple days before would allow the spices to co-mingle and deliver a nice rich taste when I was ready to use it.) Before I knew it, it was Friday night. R came over, chicken and sour cream in hand, and I got to work.

What I love about this recipe is that I can keep it in my back pocket whenever I'm entertaining people who aren't vegetarians. Alongside vegetables, R doesn't like beans either--the meat of my vegetarian enchilada. As a compromise, I assured him I'd make him his own batch as long as he provided his meat of choice. It was super easy to substitute his shredded chicken in place of my black beans and not at all inconvenient to bake the two separate. (The recipe yielded 12 enchiladas! I needed 2 baking dishes, anyway.)


Let me tell you, this enchilada recipe is now one of my favorites. It was easy to put everything together and they tasted so good. Even R agreed, going back for seconds and taking home leftovers. While the prep work was divided over two nights, that won't stop me from making these again. The way I see it, that's probably going to be a reoccurring situation--since I'm bound and determined to make as much as possible from scratch. I would recommend these enchiladas anytime; while the recipe is simple, the taste is great--thanks to the enchilada sauce, the recipe for which I will post below. As for the vegetarian enchiladas, I found the recipe here. And, while it comes with its own enchilada sauce recipe, I didn't use it. Also, I shredded the zucchini--in my attempt to hide the green vegetable from R--and I think I liked the texture more than I would if it was diced. But, I'm sure either way would still yield a delicious result!

Enchilada Sauce

Ingredients:
2 tbsp whole-wheat flour
1 tsp unsweetened cocoa
2 tbsp chili powder
1 tsp dried oregano
1 tsp ground cumin
1/2 tsp garlic powder
2 cups vegetable broth
5 tomatoes (skined & pureed)
salt, to taste (optional)

Directions:
1. Whisk flour, cocoa, and spices together in a saucepan--with the burner still off.
2. Add 1/4 cup broth and stir into a paste.
3. Slowly whisk in the remaining broth.
4. Bring to a boil over medium heat and whisk in pureed tomatoes.
5. Allow to cook a few minutes and thicken slightly to the consistency of tomato soup.
6. Remove from heat and add salt if necessary.

That's all for now--Rosalyn

Thursday, December 1, 2011

What's-left-Fritatta

So, I've found that since I've changed my diet, I've learned a lot about my body--what it wants, what it needs, what it doesn't like...

A couple of months ago, I would have openly admitted that carbohydrates were my biggest dietary weakness. Bread, pasta, bread, french fries, bread, white rice, bread--really, potatoes of any kind, bread. Yeah--in case you haven't caught on, I love bread. With butter. Dipped in oil. To scoop up spaghetti sauce. To clean my plate of any left over gravy. With jelly for breakfast. In roll form for dinner. With cinnamon and sugar for dessert. French, sourdough, focaccia, baguette, rye, sweet and baked with bananas or pumpkin or zucchini--I could go on. But, I won't.

Now that I'm making as much as I can from scratch, I've come to realize that I don't crave any of the things that I used to eat every chance I got. That's partly true because I've become particular about what ingredients--and how much of said ingredients--I'm willing to consume. But, also, I realize that I like more variety to my diet. I don't want to make the same things over and over--a habit I used to keep. I'm having such a good time trying new recipes that it's been weeks since I've made the same dinner-dish twice. Furthermore, because I have to work for my carbs--i.e. bread--I find that I don't need it, or even want it, to round out my meal.

Don't get me wrong; it's not that I'm too lazy to make what I want; it's more that because  I'm listening to my body, I know I don't need what I used to call my staples for every meal. Instead of french fries with my veggie burger (which, by the way, I'm still hunting for the perfect meatless-burger recipe!) I'm content to have a side of vegetables. One of these days, french fries will be a real treat--not simply because I will allow myself to indulge in the starchy goodness that is my favorite variation of a cooked potato, but also because I will have made it myself--the healthy way. And while making pasta is time consuming, that's not what's keeping me from making Italian dishes every night; I simply crave a more well-rounded menu. Variety is key to an exciting diet. At least, that's true for me.

Anyway--now to the point! Since I've been trying to eat less carbs and starch and more vegetables, I've neglected the potatoes that have been chilling in my fridge for weeks--maybe even months. (I'm thankful that keeping them cold has enabled them to last so long without sprouting. I don't care what anyone says, that just grosses me out!) After taking inventory of what I had remaining from my previous grocery trip--my potatoes ranking at the top of my priority list--I realized that I had enough ingredients to throw together my first frittata!


 I remember that fried rice used to be what my mom made when she was getting rid of left over vegetables--but I think frittata is going to be my new go-to recipe. I found the idea for my frittata here--but, just like Katie promised in her blog, it was perfectly adaptable to what I had laying around. It turned out to be the best scrapes meal I've ever made! This one is definitely a keeper.


My What's Left Frittata:

Ingredients:
3 small potatoes
1 yellow squash
1 red bell pepper
1/2 onion
3 spring onions (I really like onions! But, this adaptation would be just as good with only one kind of onion)
1 garlic clove
7 eggs
1 teaspoon salt
1/4 teaspoon pepper
1 tablespoon fresh parsley, minced
1 cup ricotta cheese
2 tablespoons olive oil

Directions:
Preheat oven to 375 degrees F.
Wash and dry the potatoes. Slice them as thin as you desire. Add one tablespoon of olive oil to a heated skillet and add the potatoes; allow them to cook until they are soft. 
Combine the eggs, salt, and pepper in a large bowl. Beat until well mixed. Stir in the parsley. Set aside while you chop and slice the squash, onions, bell pepper, and garlic.
Remove the potatoes from the pan and set aside. Saute the squash, onions, bell pepper, and garlic. Combine the contents of the skillet, plus the potatoes with the egg mixture. Stir until evenly distributed.
Pour half of the mixture into a baking pan (I used a 9x9 square baking dish) and sprinkle with half of the cheese; pour the rest of the mixture into the dish, sprinkling the rest of the cheese over the top.
Stick it in the oven and bake at 375 degrees F until the top is set. (About 30 minutes, give or take. I was impatient and took it out before it was completely set; I stuck it in the microwave for a minute to speed up the process. Shameful, I know--but I had someplace to be!) Once it's out of the oven, serve it with a vegetable of your choice and you've got yourself a tasty dinner.

That's all for now--Rosalyn

Wednesday, November 30, 2011

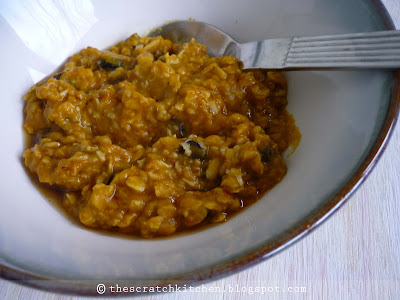
Pumpkin Oatmeal

This is the best oatmeal I have ever eaten. The recipe is from the Happy Herbivore meal plan which I highly suggest you download and donate to! I eat oatmeal almost every day with my husband. He is a traditional rolled oats with raisins and brown sugar, while I go for the Raw brand cinnamon and plum spice or chai oatmeal. (I like mine sweet!) As I sit and enjoy this delicious breakfast all I can think is that this meal plan was so worth the $5. Thank you Happy Herbivore for being a genius and adding pumpkin to oatmeal. You are awesome!

Happy Wednesday!
-Megan


the scratch kitchen Copyright The Scratch Kitchen 2012